CLICK HERE FOR BLOGGER TEMPLATES AND MYSPACE LAYOUTS »

Thursday, April 17, 2014

Coachella Weekend 2 Outfit Inspiration featuring Simply 1 LoveAccessories

Boy does time fly! I feel like I just started blogging again and quite a few weeks have passed since I last posted. Anyway today's post comes just in time for the second week of Coachella. By the way I am SUPER jealous of all you lovelies that did/will enjoy the amazingness of this years festivities!!

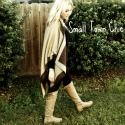
 Anyways I wanted to show you all a simple and very affordable look that works for just about everyone. I grabbed an black romper with a great crochet back detail, ankle boots and my favorite boho accessories to pull this look together. One of my favorite things about this outfit is my flower crown turned hat band by Simply 1 Love Accessories. It adds the perfect bohemian touch to an ordinarily plain outfit. You can check out the shop HERE.

Hope y'all have an awesome weekend even if you will be enjoying the festivities from afar like myself ;)

Besos, Cat


Romper: Vintage
Booties: Steve Madden (similar HERE)
Necklace: C/O The Sunday Market (found HERE)
Turquoise Cuff: Vintage
Suede Cuff: C/O Lotus Blossom Design
Hat: Forever 21 (similar HERE)
Flower Crown: C/O Simply 1 Love Accessories (HERE)


Wednesday, April 2, 2014

Candle Holder Gets Quick New Makeover

This past weekend I had some time to myself to clean up the house and organize some of my favorite spaces. Last year I posted about my jewelry display in A & I's room (found HERE) and loved the way it allowed me to easily display my favorite accessories. Since I have become a nanny my office outfits are virtually non existent and so are my jewelry wearing days. Therefore turning my favorite jewelry space into a catch all for magazines, papers and god knows what else. Once organized I decided to spruce up my favorite candle holder turned jewelry display, with one of my favorite colors...GOLD.
 
What You'll Need:
1 Tiered Candle Holder (Can be any color, I used my black one)
Paint Markers (I used a gold sharpie brand marker, but other colors and brands work as well)
 
To start off I took one of A's paint markers (I think it was sharpie brand?) and added dots to the top plates with the marker. I ended up not liking the dots, they were too random and cutesy (or as A said they looked like a clown party hahaha) I then proceeded to color in each plate entirely gold. Next I added dots to the bottom "legs" in a more uniform pattern. I let the whole thing dry for about 10-15 minutes and the whole project including drying time took just under an hour. I ended up with a chic, classic new addition to my jewelry display and it didn't cost me a penny. If gold dots aren't your style you can totally add tribal print designs, geometric patterns or even cool pastel painted hearts. Let your mind wander! 

Before:

After:


Besos, Cat